
今回は、Windows10,11で使えるログイン時に自動で時刻同期を行う方法について解説します。
ときどきWindowsの時刻がずれている場合があります。
私の場合は、パソコンを起動したままスリープ状態に移行し、その時に同期コマンドが失敗して時刻がずれていました。
今回は、その対処方法として、パソコン起動しログインした時にタスクスケジューラで同期コマンドを行います。
Windows10,11 時刻同期のコマンド
Windows10,11 時刻同期のコマンドを解説します。
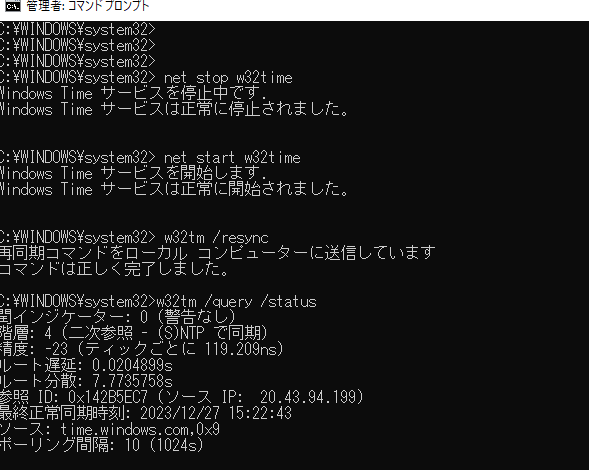
コマンドプロンプトを管理者権限で立ち上げます.
Windows Time サービスを再起動
net stop w32time
net start w32time
NTP サーバと時刻同期させます。
w32tm /resync
ステータスを表示
w32tm /query /status
下記が実行結果です。
Windows10,11 時刻同期のバッチファイル作成
上記のコマンドをバッチファイルにします。
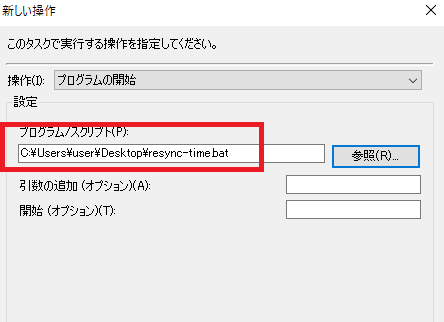
resync-time.batというバッチファイルにします。
@echo off

rem Windows Time サービスを停止
net stop w32time

rem Windows Time サービスを開始
net start w32time

rem NTP サーバと同
期w32tm /resync
Windows10,11 タスクスケジューラに時刻同期バッチの登録
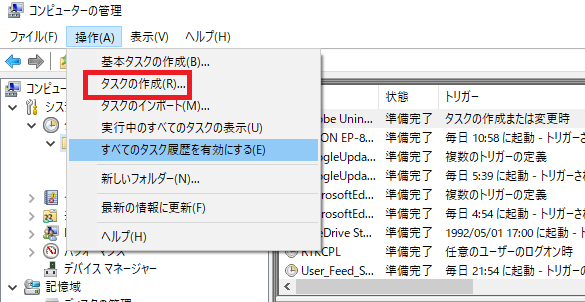
タスクスケジューラに登録します。
コンピュータの管理からタスクスケジューラをクリックします。
タスクを作成します。
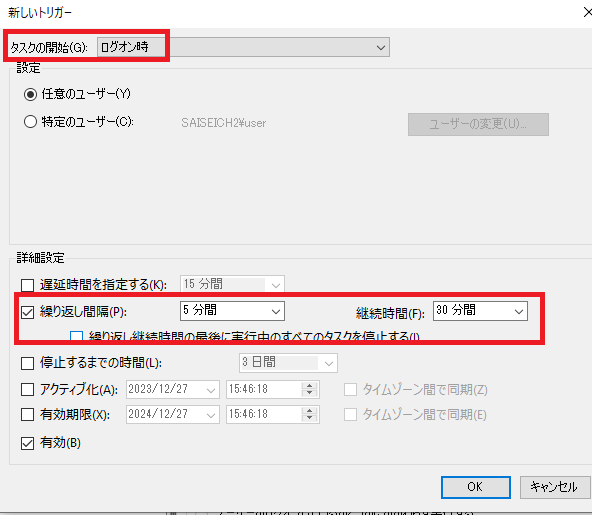
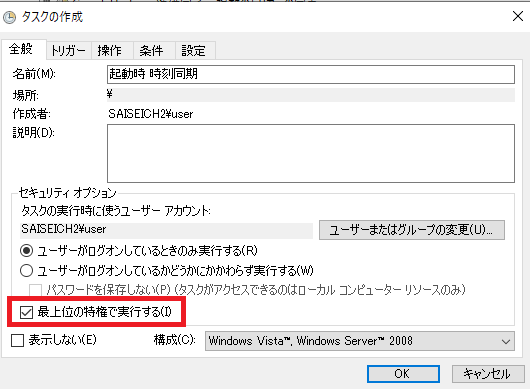
トリガーに「ログイン時」を指定します。
ネットワークに繋がっていない場合を考慮し、繰り返しを行います。
操作にバッチファイルを登録します。
タスクが失敗した場合、3回繰り返すよう設定します。
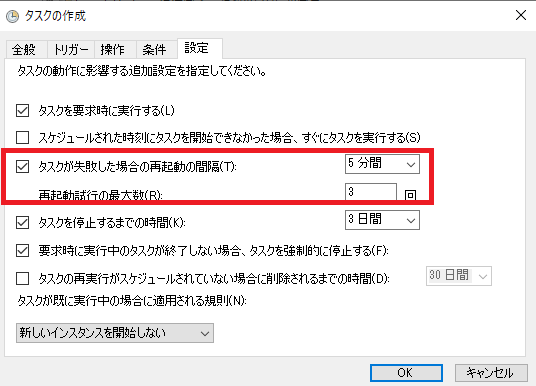
最上位の特権で実行するよう指定します。
上記で完了です。
まとめ
今回は、Windows10,11でログイン時に時刻同期を行う方法について解説しました。