
本日は、Laravel2回目として、データベースまわりとしてlaravelを使用して、「テーブルの作成」を行います。Laravelの機能としては、マイグレーションという機能になります。
テーブルの作成の流れは下記になります。
・マイグレーション流れ
1.マイグレーション実施 laravelでひな形となるマイグレーションファイルを作成
2.マイグレーションファイルの編集 テーブルの構造をphpファイルに記載
3.マイグレート テーブル作成です。
マイグレーションの実施
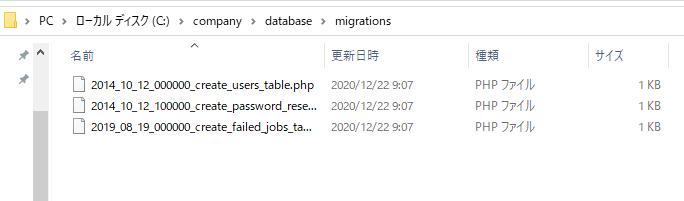
マイグレーション実行の前に、下記フォルダ内のマイグレーションファイルを削除しておきましょう。
C:\company\database\migrations
3ファイルを削除します。日付は違う可能性があります。
2014_10_12_000000_create_users_table.php
2014_10_12_100000_create_password_resets_table.php
2019_08_19_000000_create_failed_jobs_table.php
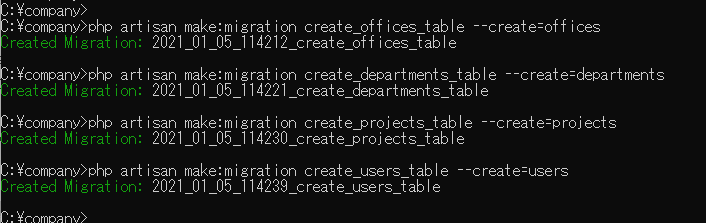
では、マイグレーションを行います。下記のコマンドを実施します。
マイグレーション時、テーブル名は複数形です。「s」が重要です。
php artisan make:migration create_departments_table –create=departments
php artisan make:migration create_projects_table –create=projects
php artisan make:migration create_users_table –create=users
本来ここで、多対多の関係である「userテーブル」と「projectテーブル」の中間テーブルを作成したいところですが、userテーブル、projectテーブルにまだ定義もデータもないためエラーになります。
マイグレートまでした後に再度、「中間テーブル」「project_user」テーブルを作成します。
マイグレーションファイルの修正
マイグレーションを実行した後、下記フォルダにマイグレーションファイルが作成されています。
確認しましょう。
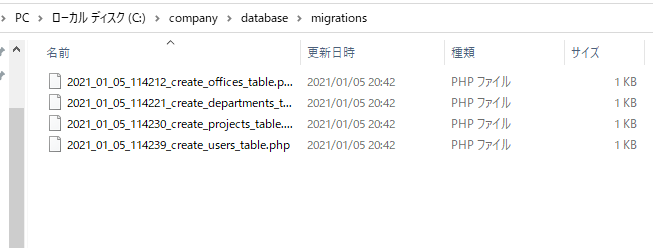
上記のファイルをそれぞれ編集します。
まずは、officeテーブルからです。2021_01_05_114212_create_offices_table.php
コードの中身は、テーブルのフィールドを定義しています。
<?php

use Illuminate\Database\Migrations\Migration;
use Illuminate\Database\Schema\Blueprint;
use Illuminate\Support\Facades\Schema;


class CreateOfficesTable extends Migration
{
    /**
     * Run the migrations.
     *
     * @return void
     */
    public function up()
    {
        Schema::create('offices', function (Blueprint $table) {
            $table->increments('id');
            $table->string('office',100);
            $table->timestamps();
        });
    }

    /**
     * Reverse the migrations.
     *
     * @return void
     */
    public function down()
    {
        Schema::dropIfExists('offices');
    }
}
続いて、departmentsテーブルです。2021_01_05_114221_create_departments_table.php
<?php

use Illuminate\Database\Migrations\Migration;
use Illuminate\Database\Schema\Blueprint;
use Illuminate\Support\Facades\Schema;

class CreateDepartmentsTable extends Migration
{
    /**
     * Run the migrations.
     *
     * @return void
     */
    public function up()
    {
        Schema::create('departments', function (Blueprint $table) {
            $table->increments('id');
            $table->string('department',100);
            $table->integer('office_id')->unsigned();
            $table->timestamps();

            $table->foreign('office_id')
            ->references('id')
            ->on('offices')
            ->onDelete('cascade');
        });
    }

    /**
     * Reverse the migrations.
     *
     * @return void
     */
    public function down()
    {
        Schema::dropIfExists('departments');
    }
}
usersテーブルです。2021_01_05_114239_create_users_table.php
<?php

use Illuminate\Database\Migrations\Migration;
use Illuminate\Database\Schema\Blueprint;
use Illuminate\Support\Facades\Schema;

class CreateUsersTable extends Migration
{
    /**
     * Run the migrations.
     *
     * @return void
     */
    public function up()
    {
        Schema::create('users', function (Blueprint $table) {
            $table->increments('id');
            $table->string('name', 100);
            $table->timestamps();
        });
    }

    /**
     * Reverse the migrations.
     *
     * @return void
     */
    public function down()
    {
        Schema::dropIfExists('users');
    }
}
projectsテーブルです。2021_01_05_114230_create_projects_table.php
<?php
use Illuminate\Database\Migrations\Migration;
use Illuminate\Database\Schema\Blueprint;
use Illuminate\Support\Facades\Schema;
class CreateProjectsTable extends Migration
{
/**
* Run the migrations.
*
* @return void
*/
public function up()
{
Schema::create('projects', function (Blueprint $table) {
$table->increments('id');
$table->string('name', 100);
$table->timestamps();
});
}
/**
* Reverse the migrations.
*
* @return void
*/
public function down()
{
Schema::dropIfExists('projects');
}
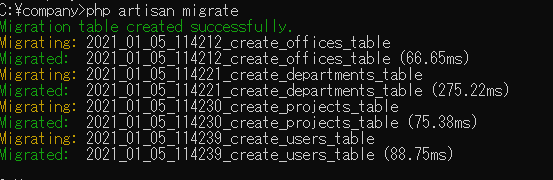
}マイグレーションの実行
マイグレートを実行します。マイグレートが正常に終了するとMySQL上にテーブルが作成されます。
php artisan migrate
中間テーブル用のマイグレーションを行う。
中間テーブル「project_user」テーブルを作成します。マイグレーションを行います。
php artisan make:migration create_project_user_table –create=project_user

続いて、マイグレーションファイルの修正です。
2021_01_05_120154_create_project_user_table.phpを修正します。
<?php

use Illuminate\Database\Migrations\Migration;
use Illuminate\Database\Schema\Blueprint;
use Illuminate\Support\Facades\Schema;

class CreateProjectUserTable extends Migration
{
    /**
     * Run the migrations.
     *
     * @return void
     */
    public function up()
    {
        Schema::create('project_user', function (Blueprint $table) {
            $table->increments('id');
            $table->integer('project_id')->unsigned();
            $table->integer('user_id')->unsigned();
            $table->timestamps();

            $table->foreign('project_id')
                  ->references('id')
                  ->on('projects')
                  ->onDelete('cascade');

            $table->foreign('user_id')
                  ->references('id')
                  ->on('users')
                  ->onDelete('cascade');
        });
    }

    /**
     * Reverse the migrations.
     *
     * @return void
     */
    public function down()
    {
        Schema::dropIfExists('project_user');
    }
}
最後にマイグレートします。

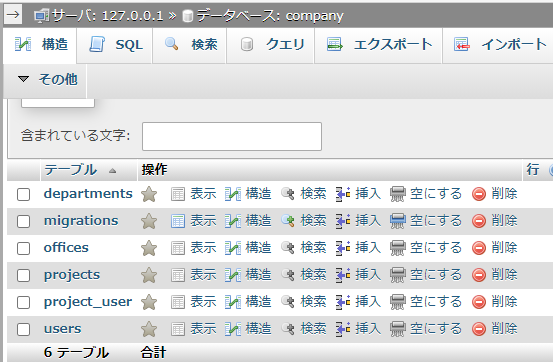
以上でLaravelでのマイグレーション処理は終了です。
テーブルが作られたかMySQLで確認しましょう。
まとめ
以上、Laravelでのテーブル作成の方法でした。次はテーブルにレコードを投入するシーダーという機能ついて解説します。