
こんにちは、本日は、個人でMicrosoft365 Businessに登録する方法について説明します。
まず、Microsoft365には大きく2種類あります。家庭用と企業用です。
通常のoffice(excel,word,powerpoint,outlook,teams)などはどちらにも含まれていますが、
企業用にしかないアプリも存在します。例えば、PowerAppsやAutoPilot です。
上記のようなアプリを家で学習して、仕事に活用したいっといった場合は、Microsoft365の企業用を契約するとよいです。
今回は、個人でMicrosoftの企業用サービスであるMicrosoft365 Business Standardに申し込みを行いました。一部、画像が取得できなかったものもありますが、流れをお伝えできればと思います。
Microsoft365の概要
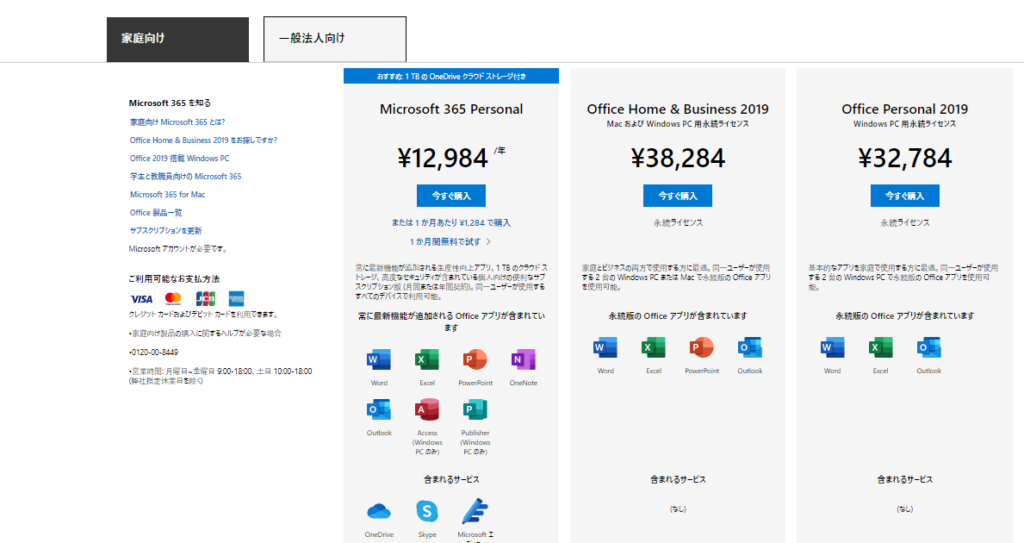
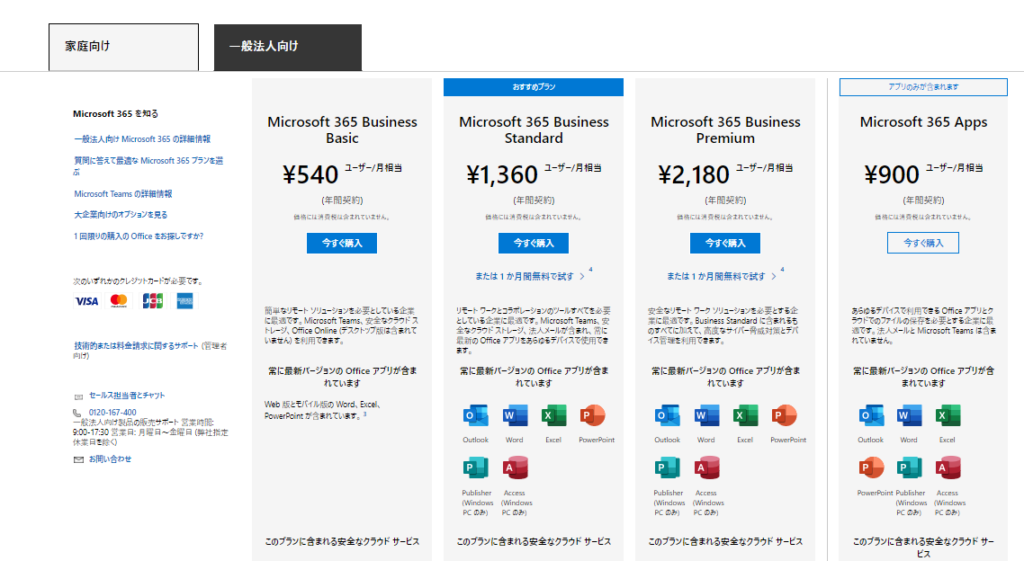
最初に概要として、家庭用と企業のサービスの一覧を掲載します。
1ライセンスであれば、価格はどちらも大した差はありません。
家庭向けです。
法人向けです。
https://www.microsoft.com/ja-jp/microsoft-365/buy/compare-all-microsoft-365-products
上記URLから確認ください
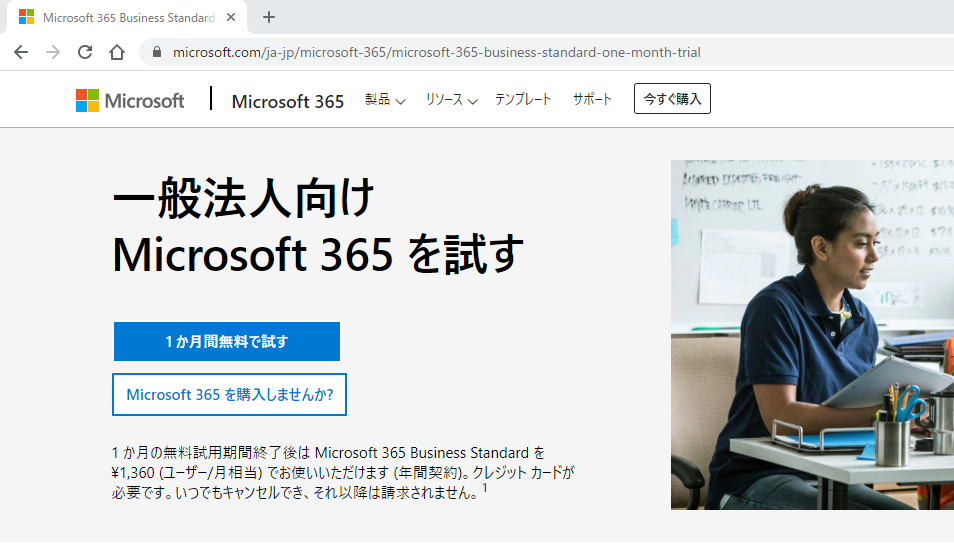
MicroSoft365 Business Standardの手続き
では、Business Standardの手続きの流れです。
事前に準備するものを記載します。
・スマートフォン(ショートメッセージ確認用)
・クレジットカード
・メールアドレス
下記のURLにアクセスし、登録を行います。
https://www.microsoft.com/ja-jp/microsoft-365/microsoft-365-business-standard-one-month-trial
最初にメールアドレスを入力します。
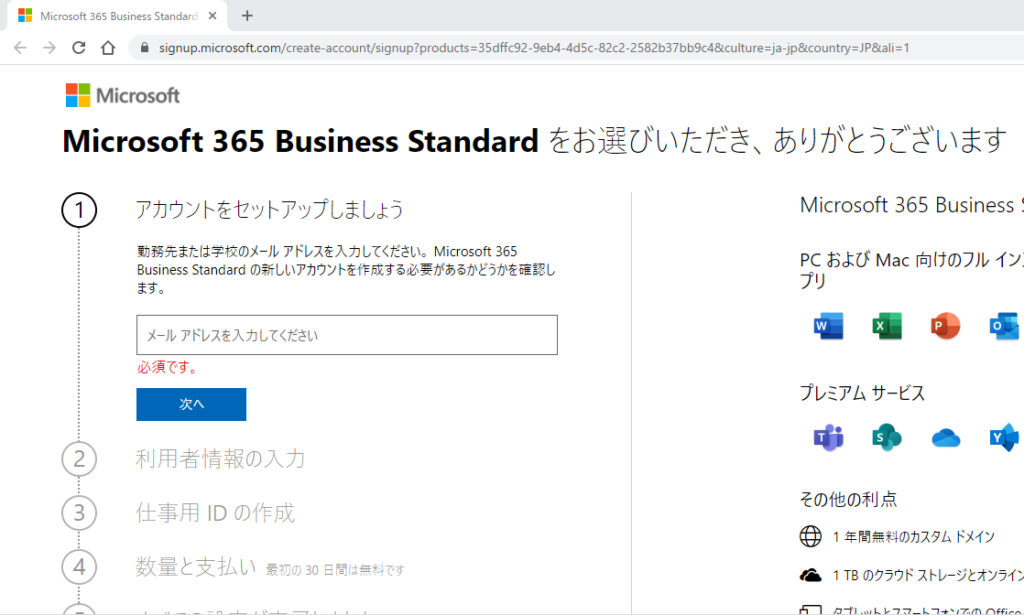
続いて、「氏名」「住所」「連絡先電話番号」を入力します。

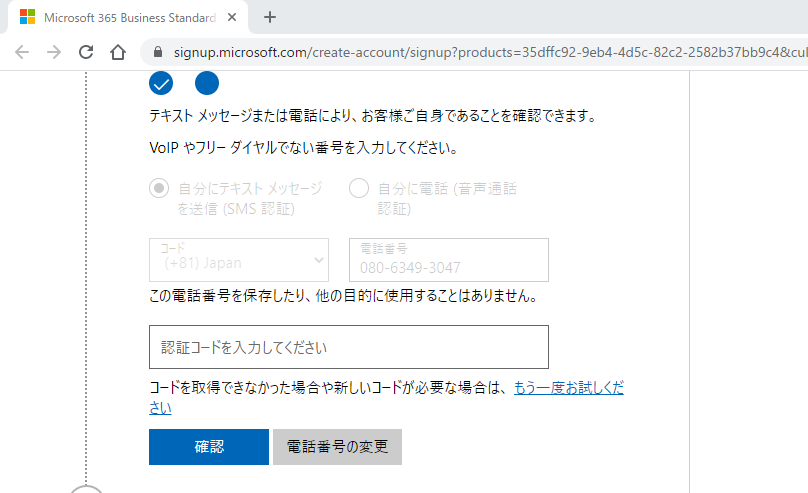
登録した電話番号に認証コードを送信し、入力します。
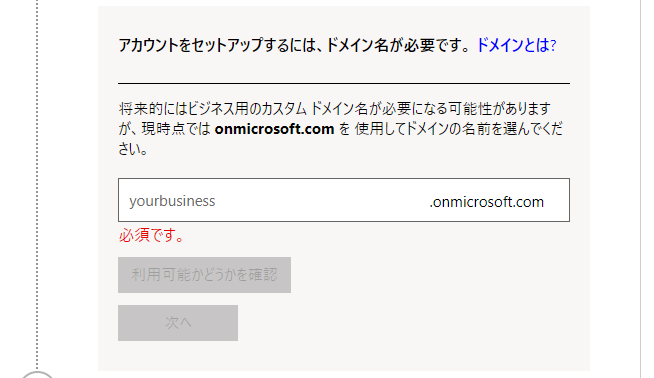
次にドメイン名を入力します。任意のドメイン名で大丈夫です。
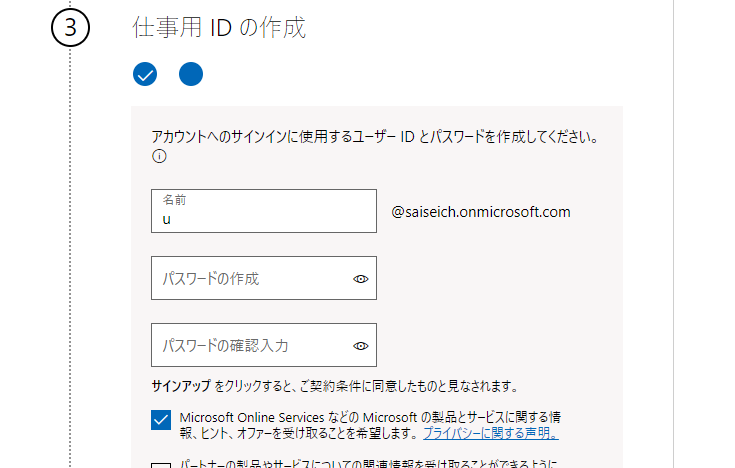
ユーザーIDを作成します。
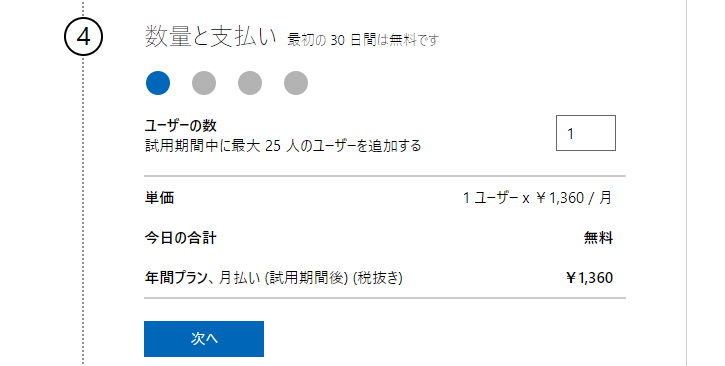
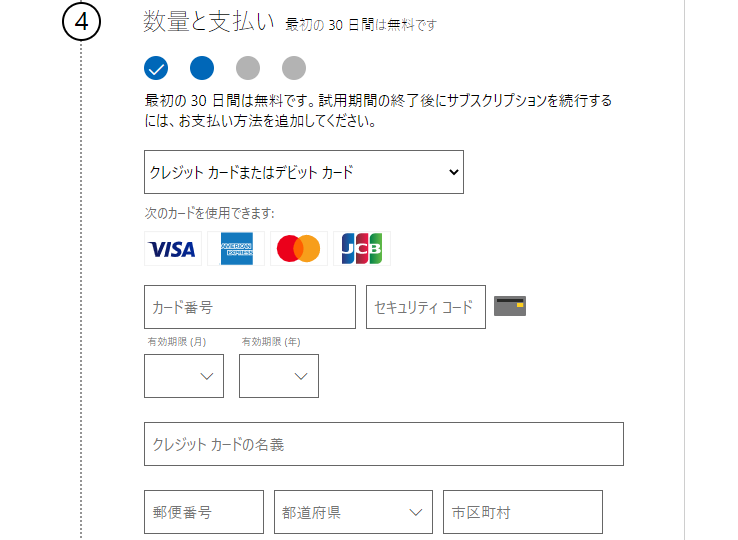
数量を入力します。最小の1ユーザにしました。
クレジットカードを登録します。
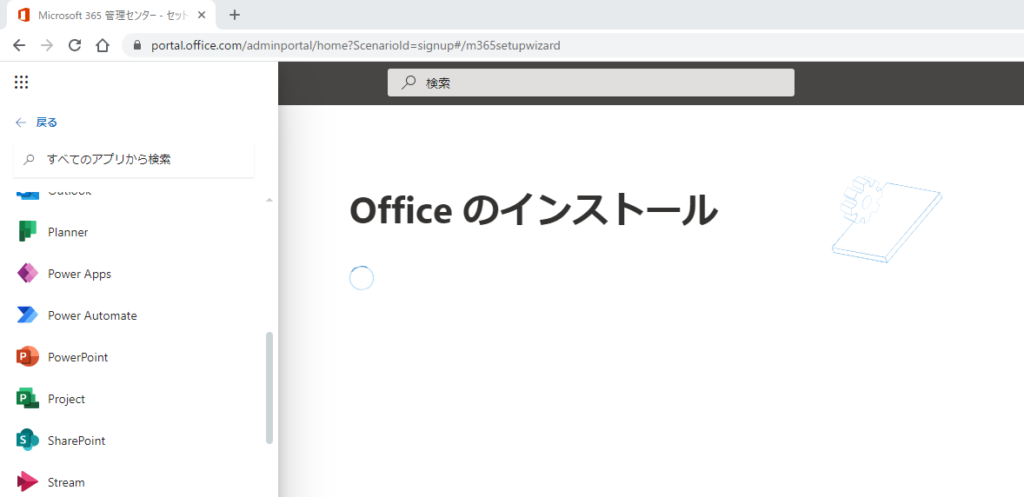
以上で完了です。完了後、Microsoft365の管理画面へ遷移します。
まとめ
Microsoft365の登録の流れを説明させていただきました。
今後は、PowerAppsの使い方を紹介を予定しています。